Mechanical
AutomatePro Installation
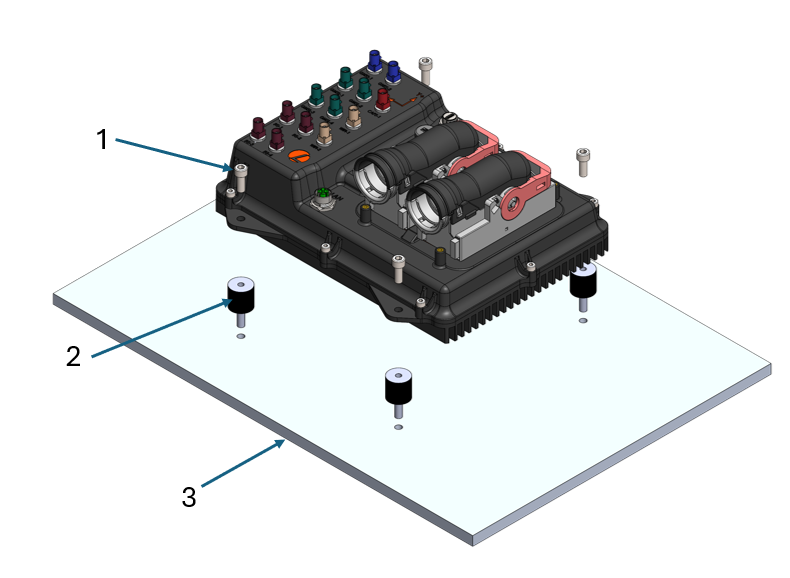
1. Install the four provided rubber stand-offs (2) and tighten them until they come to a hard stop. For through-hole installations, secure each stand-off with a nut on the underside before tightening. 2. Position the AutomatePro on top of the stand-offs and secure it using the four provided DIN912-M6x16 socket head cap screws (1).
Breakout Board
Installation
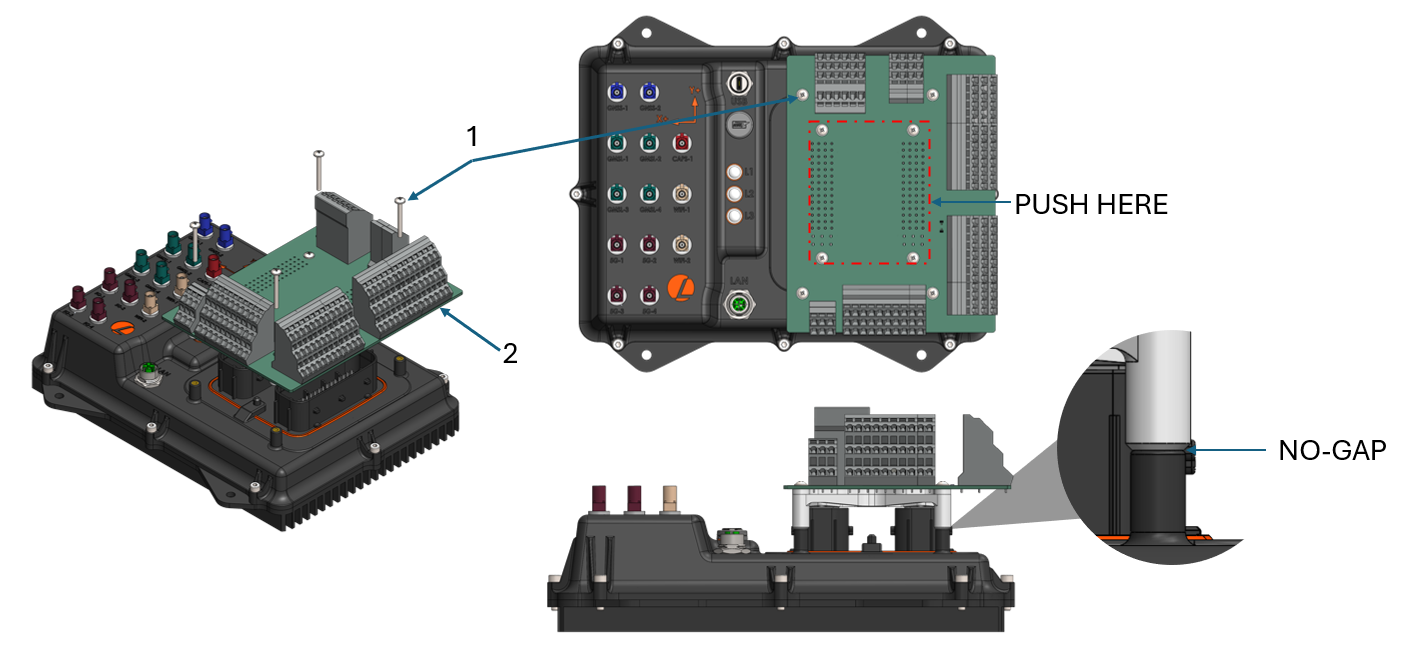
1. When installing the breakout board, first ensure that the device is powered down and remove the main connectors. 2. Align the connector and carefully push the breakout board onto the AutomatePro. Warning: Only push inside the area highlighted. Push the board down until it comes to a hard stop. 3. By hand, install all four M3 x 30 bolts [1]. 4. Begin tightening the bolts in a cross-star pattern. Tighten the bolts until the part comes to a hard stop, as shown in the image.
Removal
1. Ensure that the device is powered down and remove any external connectors. 2. Using a tool, carefully loosen and remove the four M3 x 30 bolts [1]. 3. Once the bolts are removed, carefully lift the breakout board off the AutomatePro. Warning: Only lift from the area highlighted to avoid damaging the connectors.
DIN Rail Installation
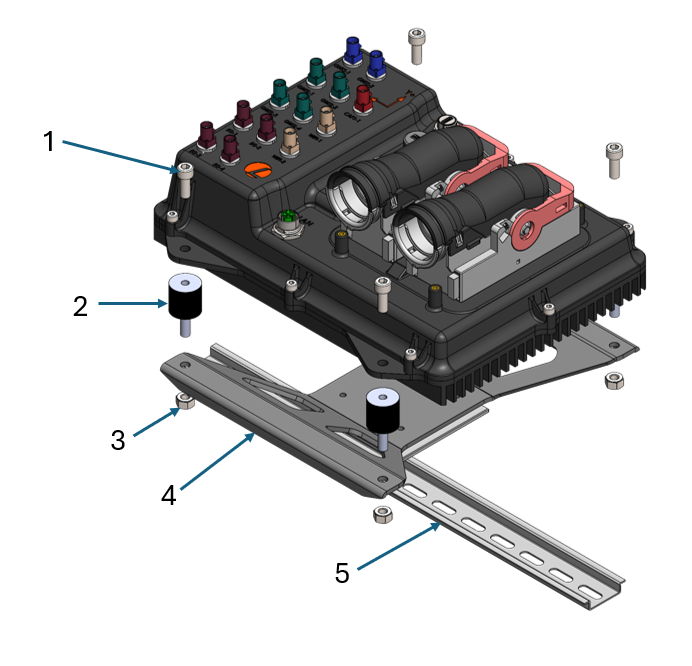
1. Install the four rubber stand-offs onto the DIN rail mount (4) using the M6 nuts (3). 2. Position the AutomatePro on top of the stand-offs and secure it using the four M6x16 socket head cap screws (1). 3. Secure the entire assembly to the DIN rail (5).
General Installation Notes
- In high-vibration environments, use a threadlocker or wedge washers to ensure the fasteners remain secure.
- If custom stand-offs are used, maintain a minimum clearance of 6mm between the bottom of the heatsink and the mounting surface.
- The AutomatePro can be mounted in any orientation; however, mounting the unit with the Y+ axis pointing upward is recommended to prevent water pooling and improve convective cooling.